Techie Tuesday: Selective Coloring
Selective coloring can be a tricky thing, depending on the way you decide to go about it. This tutorial will show you and easy way to go about it (because we all like easy, right??)
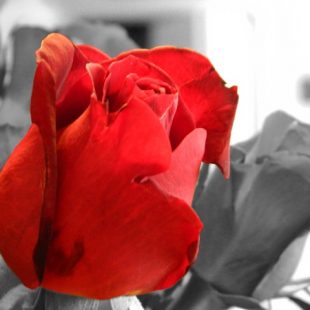
Here’s the original photo I’ll be working with:

At the end only the rose in the forefront will be red – the rest of the photo will be black & white!
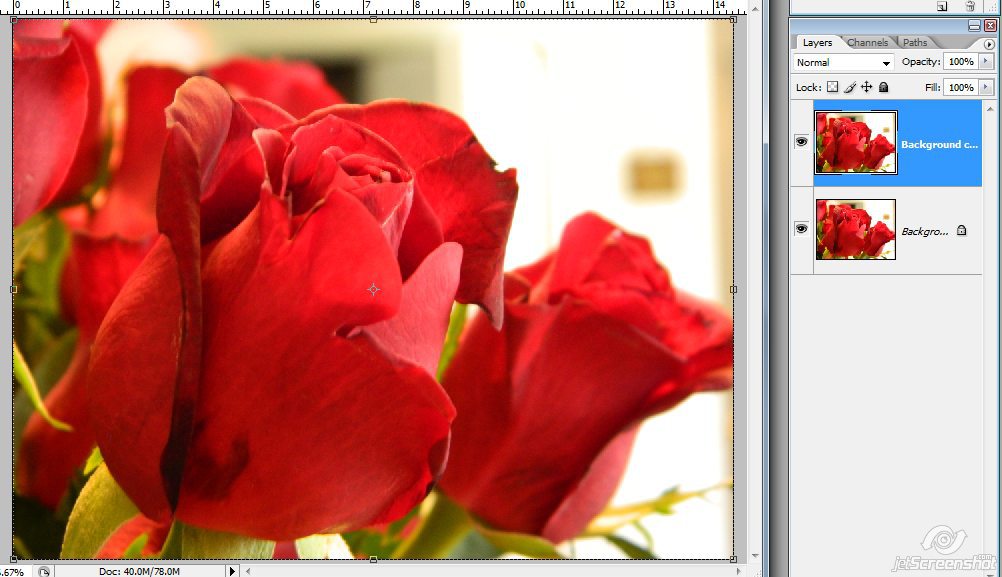
First, duplicate your photo:
Desaturate the duplicate:

Next, add a Layer Mask with “Reveal All”

This is what your layer palette should look like now:

The white of the layer mask is covering your photo. Click on the white mask to make sure it’s selected

Next, select your brush tool and make sure you have the default colors selected (black for foreground color and white for background color)

Now, with the brush tool & making sure that black is your foreground color, start coloring over the part of the photo that you want colored:

The black color erases the mask so that your original photo can be seen behind it.
If you go “outside the lines” of what you want in color, that’s ok….

Just flip the black & white colors so that you use white instead of black and go over the part you don’t want in color:

White puts the black and white photo back into your image.

Then flip the white back to black and continue on. Here you can see where I ‘colored’ black on the mask and the result:

And the finished photo:

There are loads of ways to get to the same result, but I’ve found this one to be the easiest so far. You can even use this method explained earlier this month to achieve the same goal. If there’s a different method you use, I’d love to hear about it!
Nancy Smeltzer said...
on February 26th, 2020 at 5:19 am
I am so delighted to recently have discovered PickleBerryPop and your wonderful series of tutorials. Having taught 7th graders for 27 years, I so appreciate clearly written instructions and your staff not only knows their subject matter but knows how to easily convey it. I also appreciate the nice big screen shots of the exact tools you’re talking about that are being called for to use in PS or PSE. They’re a pain to make, especially the addition of the nice big red arrows, but I don’t know how many professional photographers & videographers are depending on what their cameras are capturing and us are their audience to squint at the screen and hope that we have the same version of PS or PSE that they are talking about. It’s tedious to stop/start the video to try and get what that little square is being called for. So, thank you, thank you, thank you for really making life easy..:)