
Drupal is one of the best Content Management Systems (CMSs) available. It’s highly scalable and secure software. However, creating stylish, modern websites using Drupal isn’t as easy as it could be. If that’s your experience, migrating from Drupal to WordPress could be the answer.
WordPress offers many of the same features as Drupal, but it’s much easier to use. Furthermore, the WordPress community is massive, making it easier to find help for any feature or change you want on your website.
This guide will discuss why it could make sense to migrate from Drupal to WordPress. We’ll discuss what you need to do before you move and then go through the migration process step by step. Finally, we’ll talk about what to do after you start using WordPress. Let’s get to work!
Check Out Our Video Guide to Migrating From Drupal to WordPress
Why You Should Consider Moving From Drupal to WordPress
There are multiple reasons to use Drupal. It’s open-source software and one of the most powerful CMSs on the market. Drupal installations can scale easily, and there’s a large community of users and developers who can provide new users and enthusiasts with help:
The downside of using Drupal is that it’s not a beginner-friendly CMS. There’s a significant learning curve to mastering it, and updating the software can be a very involved process. If you’re a seasoned developer, you can work around those issues.
However, if you’re working on your first website or a simple project, you could be much better off using WordPress:
WordPress can do everything Drupal can while being a much more user-friendly option. Plus, it’s much easier to get started with WordPress.
Furthermore, if you already have a Drupal website, you can migrate it to WordPress in a relatively short time and start reaping the benefits right away. However, before you get started, there are some things you need to know.
Things to Consider Before Migrating From Drupal to WordPress
Migrating a website from one CMS to another requires some preparation. Before moving from Drupal to WordPress, you need to find a web host or set up a new website. You’ll also have to back up your existing files.
Set Up a New Website or Find a New Web Host
Many web hosts enable you to choose between Drupal and WordPress (among many other options) when you’re setting up a new website. Your provider might also host multiple websites through its platform.
If you have a hosting plan that supports multiple websites, you can set up a new one for WordPress. Doing that will enable you to migrate your Drupal site without signing up for a new hosting provider or changing plans.
That approach works well if you’re happy with your current hosting provider. Moving to WordPress opens up a whole world of possibilities and dedicated WordPress hosting services.
Many providers focus entirely on WordPress websites and offer features to make life easier for users like you – Kinsta is one of them:
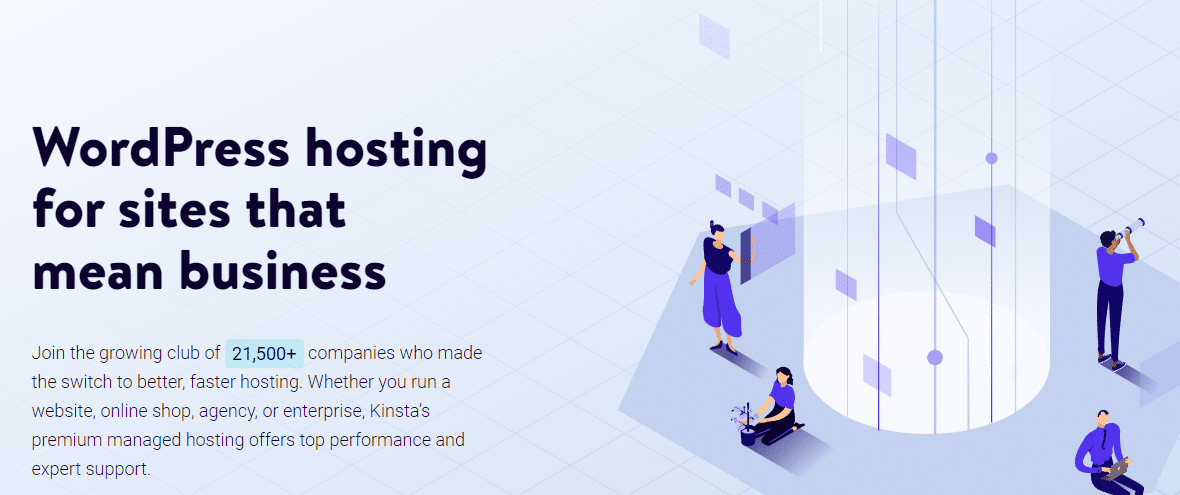
Managed WordPress hosting takes a lot of maintenance work off your hands. Some tasks that you don’t have to worry about if you’re using Kinsta include:
- Backing up your website
- Obtaining and installing an SSL certificate
- Integrating your website with a Content Delivery Network (CDN)
- Scanning for and removing malware from your website
We take care of all of those tasks regardless of which Kinsta plan you choose (all par for the course with managed hosting). You also access functionality such as staging sites and integration with DevKinsta (our local WordPress development tool).
If your current hosting plan only enables you to have a single concurrent website, you can’t replace it with a WordPress installation without losing your Drupal data. You need to either upgrade your plan or sign up for a new web host in that scenario.
Before you sign up for any web hosting service, we recommend researching. There are plenty of great Kinsta alternatives that can suit your needs if you’re working with a limited budget or looking to host a personal website.
Back Up Your Drupal Data
Whenever you’re about to make significant changes to your website, we recommend backing up everything first. The Drupal migration process doesn’t involve deleting any files from your website. However, it never hurts to follow best practices if something goes wrong.
Backing up Drupal websites is a relatively involved process. The CMS doesn’t include any built-in backup tools, so you need to do everything manually.
Backing up a Drupal website involves making copies of two components:
- Your site’s database
- The Drupal root directory
Drupal officially recommends using modules for backing up your database. Two of the developer-recommended options are Backup and Migrate and Backup Database.
Once you choose a database-backup model, you’ll also need to copy the entire Drupal root directory. The best way to do this is to connect to your website via Secure File Transfer Protocol (SFTP) and download a copy of the root folder to your computer.
We recommend saving both the database and root directory backup files in the same folder or compressing them together. That way, you’ll have a complete website copy that you can use to restore your Drupal site in case anything happens.
How to Migrate From Drupal to WordPress (10 Steps)
Before we get to work, you need to have a web host ready to set up a new website. We’ll start from scratch when installing WordPress and moving your Drupal content to the new website.
Step 1: Install WordPress
There are several ways to install WordPress, depending on your web host. If you’re using Kinsta, you’ll get the option to install WordPress automatically when you set up a new website:
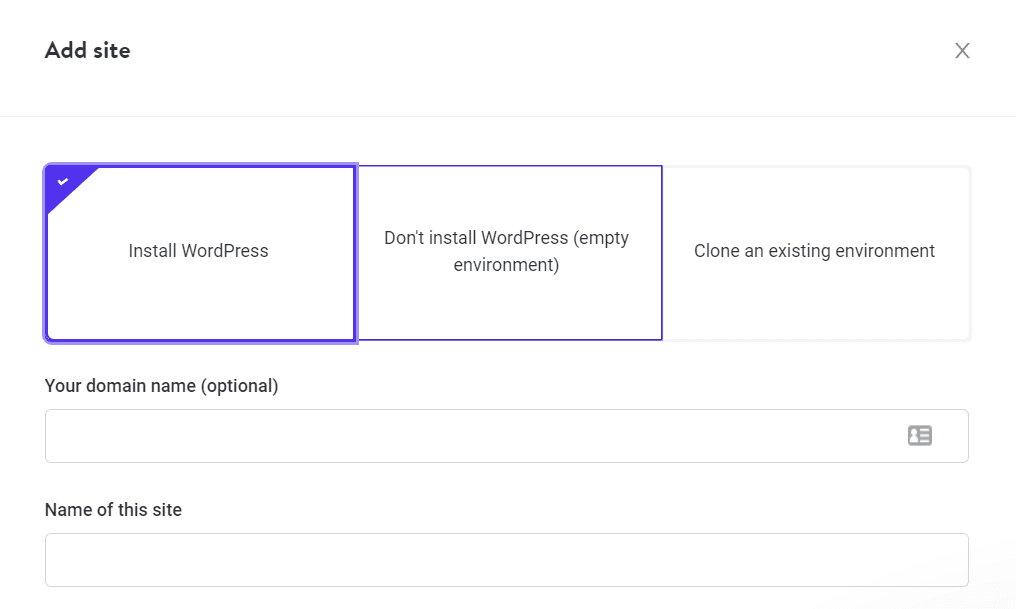
Other web hosts usually come with some software installer, such as Softaculous. You can use it to help you set up popular CMSs, such as WordPress, with only a few clicks.
If you’re more of a DIY-kind-of-person, you can also install WordPress manually. To do so, download the CMS installation files from WordPress.org. You’ll need to upload those files to your web host and run the WordPress installer. It will walk you through the rest of the process.
Once your WordPress installation is ready, you’ll gain access to the dashboard. You’ll spend most of your time using WordPress here, so it’s wise to get acquainted with it:

We’ll use a WordPress plugin to migrate your website from Drupal since it’s the easiest method. However, before we get to that, we need to choose a permalink structure for your website.
Step 2: Choose a Permalink Structure in WordPress
Drupal gives you a lot of control over how your website’s URLs look. Let’s say, for example, that you have a Drupal post with the following URL:
yourwebsite.com/blog/name-of-the-post
That’s a clean-looking URL structure ideal for any website. By default, WordPress uses a different URL or permalink structure that looks like this:
yourwebsite.com/?=123
After you migrate to WordPress, the content you bring over will lose the URL structure you set up in Drupal. That means your pages and posts will have URLs that look like the previous example.
WordPress makes it easy to change your site’s permalink structure, and the earlier you do it, the better. If you change the permalink structure before migrating content, you can easily replace internal links afterward, which we’ll cover in another step.
For now, go to Settings > Permalinks and select a new URL structure. Our favorite is the Post name option:
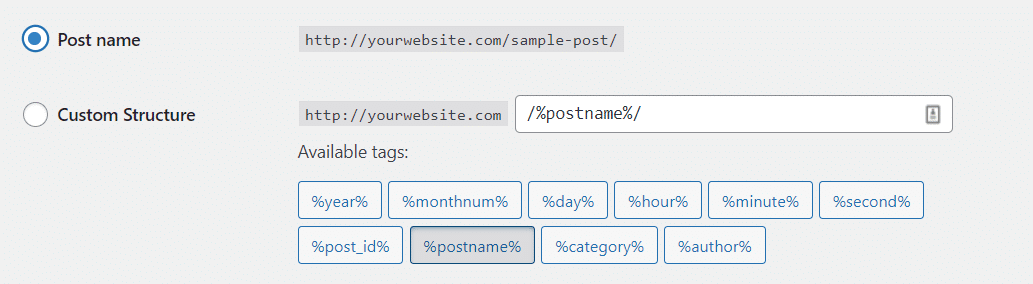
The Post name URL structure enables you to set custom permalinks for each page and post that you publish. Alternatively, you can set up a custom URL structure, but the Post name option will suffice in most cases.
Step 3: Set Up the FG Drupal to WordPress Plugin
Traditionally, migrating a website from another platform to WordPress requires a lot of manual exporting and importing of files. However, since Drupal is such a popular CMS, dedicated plugins can help facilitate the migration process.
FG Drupal to WordPress is one such plugin, and it’s our favorite tool for the job. It will help you connect WordPress to Drupal and migrate all of your site’s content, including posts, pages, categories, tags, images, and metadata:
It’s important to note that FG Drupal to WordPress is a free plugin that offers a premium version. The free software can do everything that we mentioned in the last paragraph. Furthermore, if you pay for a premium license, the plugin can help you migrate comments, user accounts (including authors and administrators), custom fields, and navigation menus.
In our experience, the free version of the plugin does everything that most users need. The only caveat is for websites that need to import users.
For example, imagine you’re running an online store in Drupal, and you want to migrate your customer base to WordPress. In this scenario, the premium version of FG Drupal to WordPress can save you a lot of time.
Once you decide which version of the plugin to use, it’s time to install it. We’ll be using the free version, so to follow along, go to Plugins > Add New and look for the plugin using the search bar within the page:
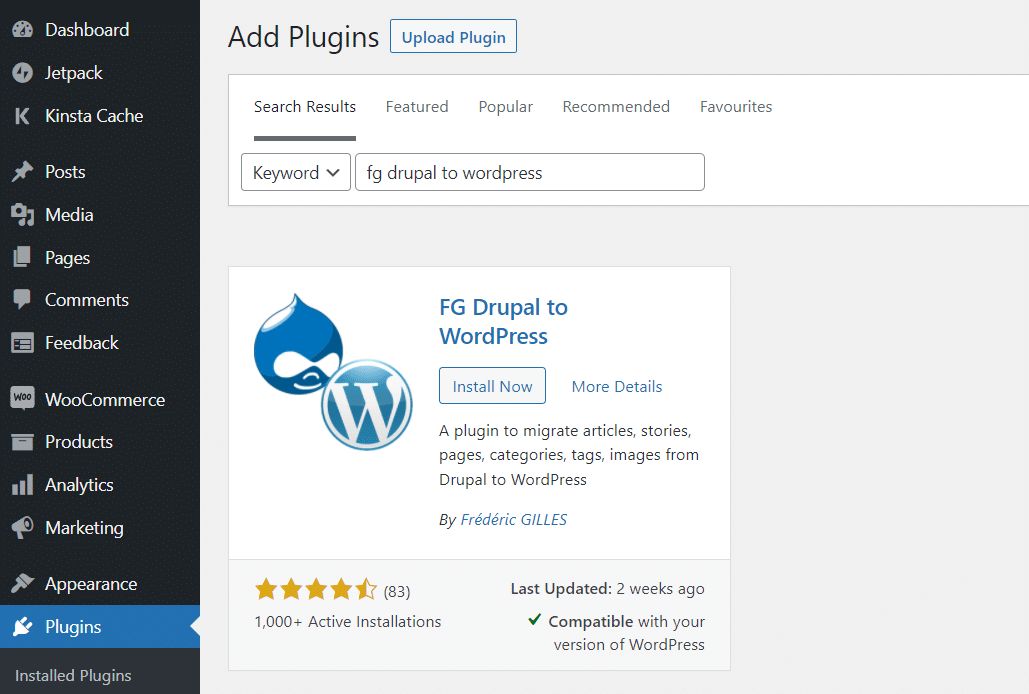
Click on Install Now and give WordPress some time to install the plugin. When it’s ready, you’ll see an option to activate it. Select that button and now let’s get to work on importing your Drupal content into WordPress.
Step 4: Select Your WordPress Content Settings
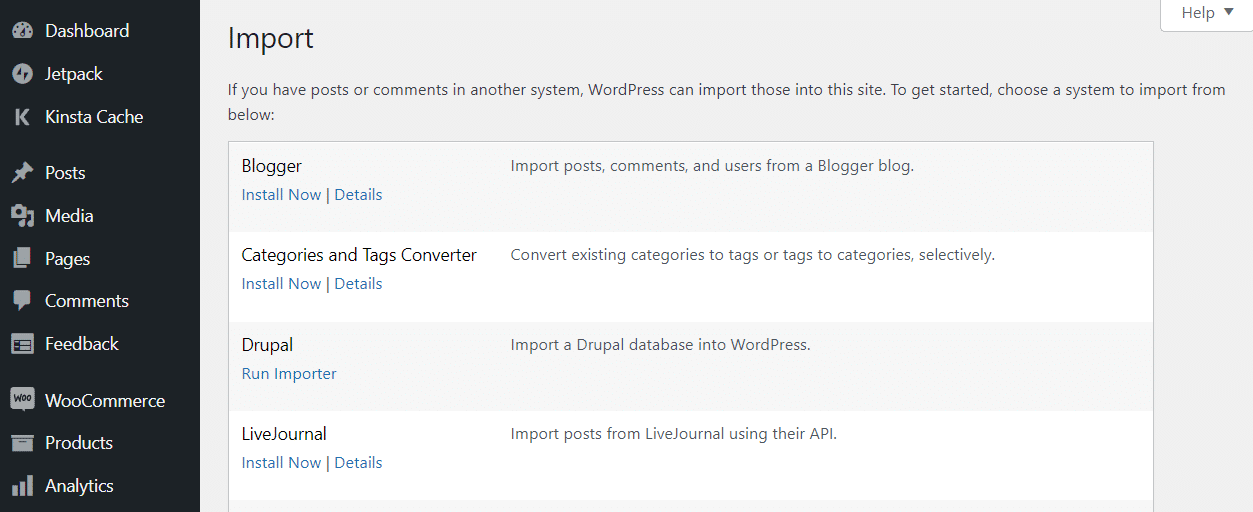
To start the migration process, go to Tools > Import in WordPress. Afterward, click on Run Importer under Drupal:
The importer page includes a broad range of settings that you need to configure before launching the migration process. Let’s start by selecting whether the importer should remove all existing WordPress content:
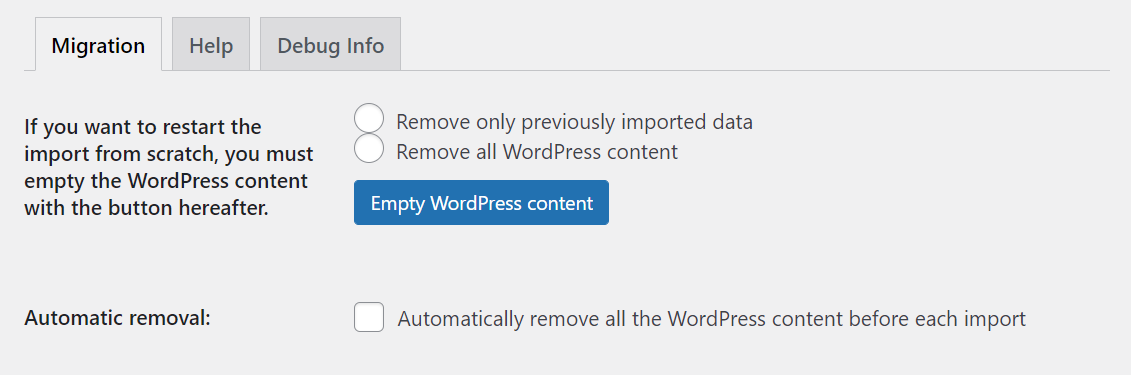
Since you’re using a brand new site, you shouldn’t need to wipe its content before launching the migration. However, you can select the Remove all WordPress content option if you’ve added any test pages or posts to your website.
Step 5: Enter Your FTP Credentials
Next, WordPress will ask for your Drupal site’s URL. You’ll also need to choose how the plugin will download media files from your Drupal site. The default option uses simple HTTP downloads.
However, we recommend the FTP option if you’re dealing with a large website with a broad library of content:
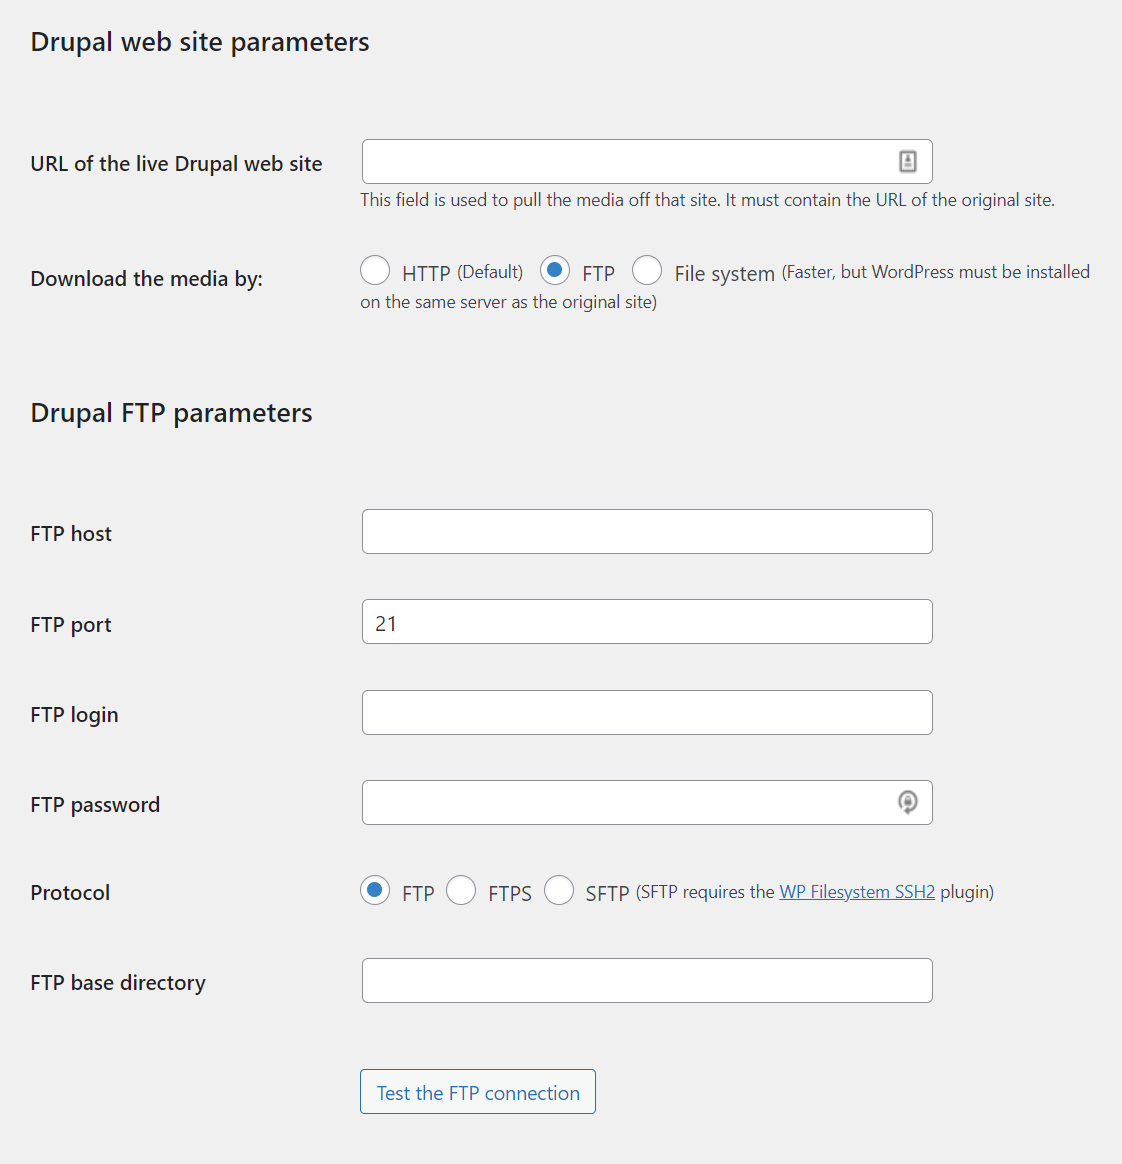
You’ll need to enter the FTP credentials that you use to access your Drupal website. If you’re not sure what these credentials are, you should be able to access them through your web hosting control panel. However, make sure that you’re using the credentials for your Drupal site and not the ones for WordPress.
After you enter the credentials, you can click on the button that says Test the FTP connection. If the credentials work, you’ll see a success message. If you see an error message instead, there may be a problem with the credentials or the specified protocol.
Step 6: Enter Your Drupal Database Parameters
Next, the plugin will ask you to enter your Drupal database parameters. You’ll need to specify what type of database your Drupal site uses (MySQL, SQLite, or PostgreSQL), its hostname, port, name, and your user details:
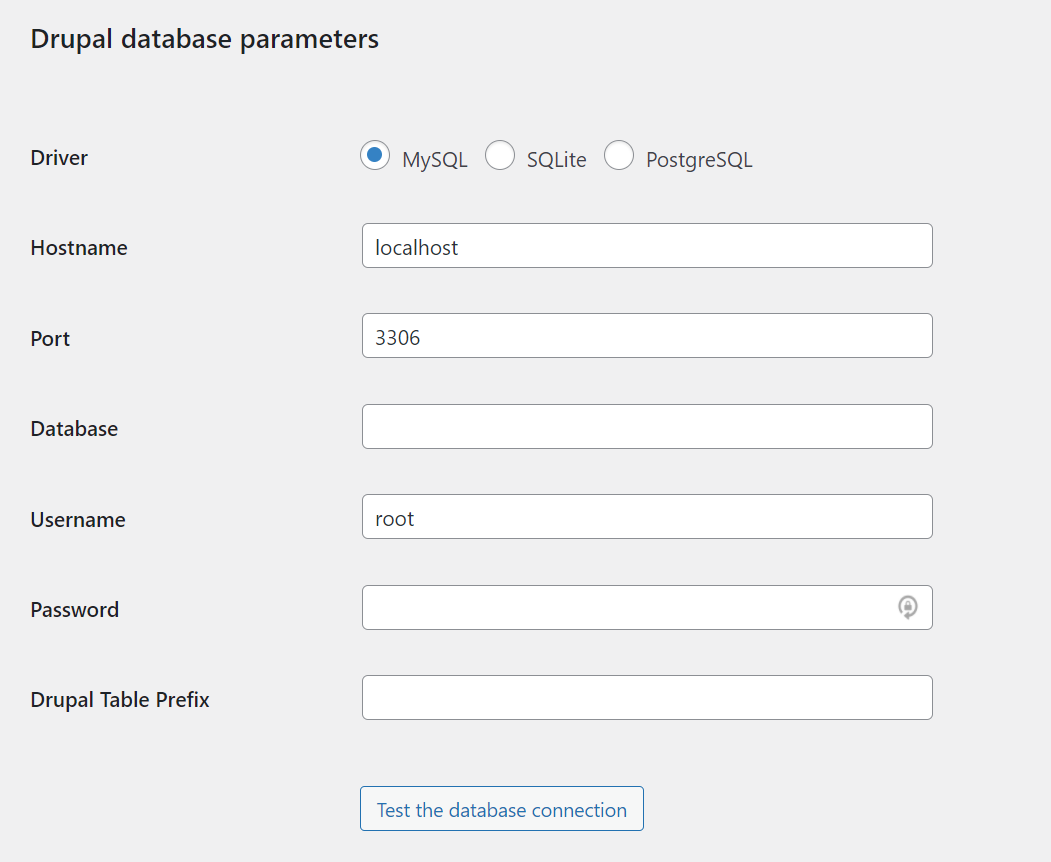
Don’t worry if you don’t recall those details. You can find that information by opening your Drupal site’s settings.php file and digging around inside it. You’ll need to connect to your Drupal site using FTP or your web host’s file manager to find that file.
Once you’re in, navigate to drupal/sites/default/settings.php and use a text editor to open the file. Be careful not to change settings.php, as any adjustments might break your website. You only need to locate and copy the information that FG Drupal to WordPress requests.
Enter the database parameters and click on Test the database connection to ensure the correct settings. The plugin will show you a success message if everything is up to code.
Step 7: Adjust Your Post and Page Import Settings
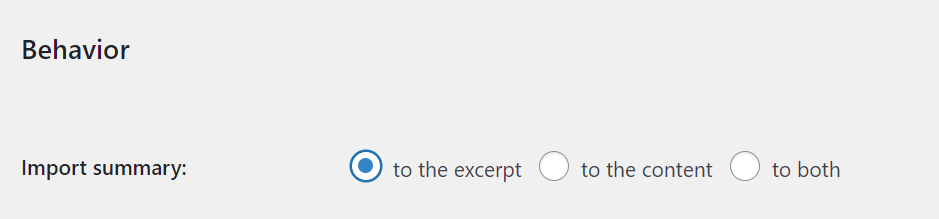
The last settings you need to configure control how the plugin imports posts and pages from Drupal. Firstly, you choose whether the plugin will add post and page summaries to their content in WordPress or import them as excerpts.
We recommend the latter option because it’ll save you from adding excerpts manually in WordPress:
Next, you need to tell WordPress where it should store the media files it imports. We recommend choosing the default options, which will use the standard WordPress media directories to store the imported files.
You can also choose which image WordPress should use as a featured element for your posts and pages. The image field option will select the Image file you use in Drupal. You can see it here below the Drupal editor and the Tags field:

The rest of the plugin’s settings enable you to stop the program from generating thumbnails or adding the featured image to the body of your imported content. We recommend keeping all of those extra options disabled.
Here’s what your media settings should look like now:
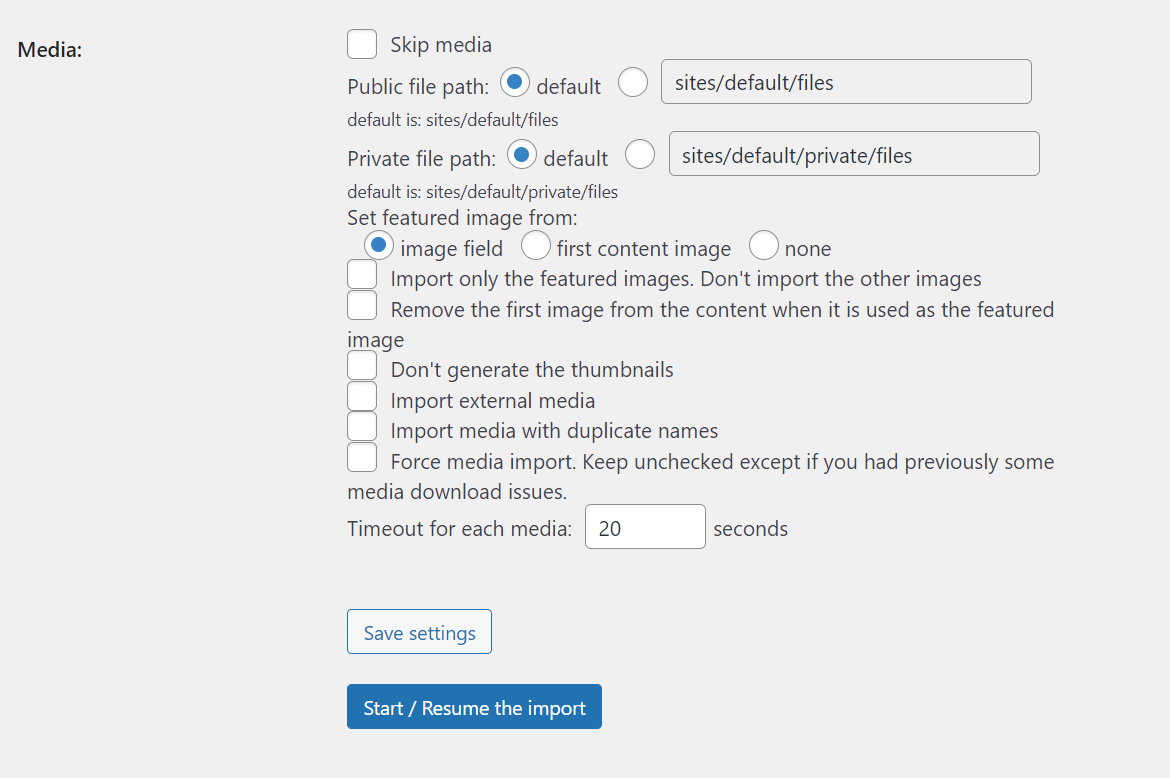
By default, FG Drupal to WordPress will abort the import process for a media file if it takes over 20 seconds to load. That setting can help prevent the migration from getting stuck if you’re not getting a response from your Drupal site’s server. However, it shouldn’t be an issue if you’re using a decent web host.
Step 8: Migrate Your Site From Drupal to WordPress
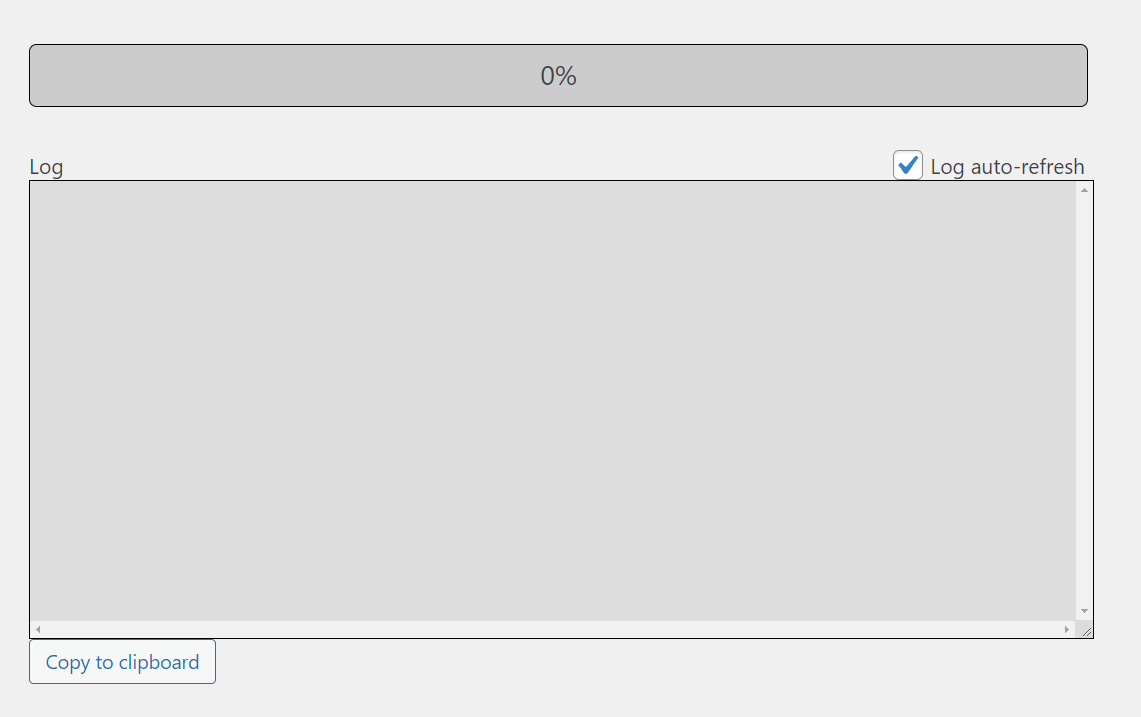
Now that you’re ready, click on Start / Resume the import and follow the migration process through the progress bar and log field right below:
Once the migration is complete, you’ll see a final success message. Before you leave this page, scroll down to the After the migration section and click on the button that says Modify internal links:
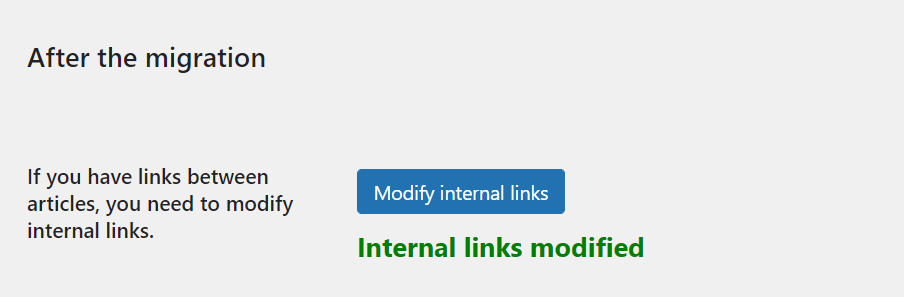
That feature will update internal links within your website to reflect the new WordPress permalink structure. After you use it, we recommend checking out some of your pages and posts to ensure internal links are working correctly.
It’s essential that you only do this process after setting the permalink structure for your WordPress website, which we did during the previous step. If you modify the permalink structure afterward, your internal URLs might not work.
Step 9: Point Your Domain Toward WordPress
By now, all of your Drupal content is in WordPress. You have a fully working website, and the only thing missing is updating your domain info. Right now, if visitors try to access your domain, they’ll go to your Drupal website.
Instead of registering a new domain, you want to point the existing one toward WordPress. That process can vary depending on whether you used a domain registrar or set up the domain through your hosting provider.
If you used a domain registrar, you’ll need to access your account from that platform and update the property’s DNS settings. That information tells the domain where it should direct visitors. If you’re not sure how to change these settings, you can check your domain registrar’s documentation.
Alternatively, if you’re a Kinsta user, you can use MyKinsta to point a domain toward your website. You’ll need to verify the domain during the process, but Kinsta will take care of the rest.
Step 10: Choose a Theme for Your WordPress Website
Although all your Drupal content is now in WordPress, your website probably looks a lot different than before. That’s because you’re likely using one of the WordPress default themes. They’re not bad options, but they’re meant to be customized or replaced with other templates.
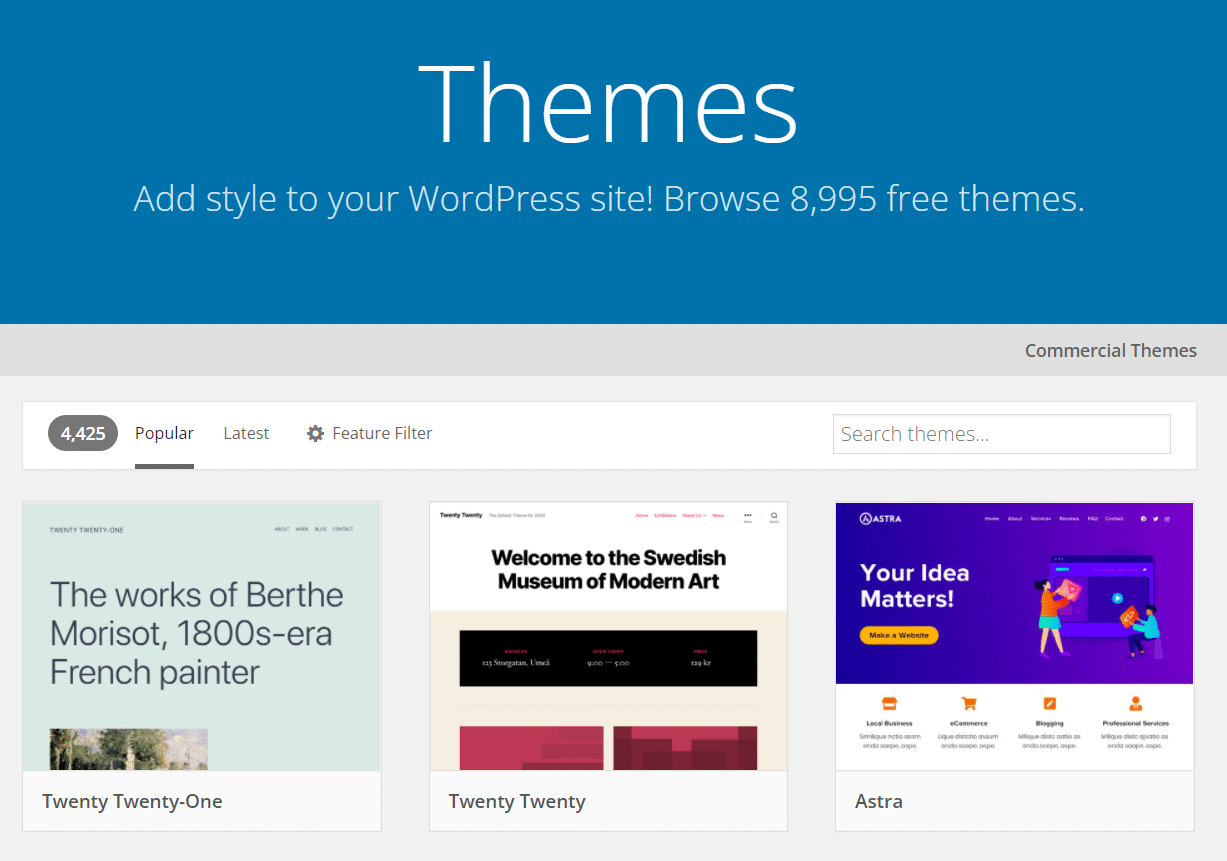
One of the many upsides of using WordPress is that you have a massive number of choices for themes. There are thousands of free and premium themes to pick from.
If you’re new to WordPress, we recommend starting your search in the WordPress.org theme repository:
If you have access to a staging website, you can test new themes before making any changes permanent. That way, you’ll be able to try dozens of themes without impacting the user experience on your website.
After you choose a theme, you can start customizing the style of your pages and posts using the Block Editor. The Block Editor’s experience is miles ahead of what Drupal offers with features and ease of use. Therefore, it’ll probably become one of your favorite aspects of using WordPress. You can even customize your WordPress theme itself.
If choosing a template proves difficult, we can point you toward our favorite WordPress themes. That list includes options for different types of websites, so the chances are good that you’ll find something that you like (plus, all of them are responsive).
It’s also worth noting that you don’t need to pick a theme that looks just like your previous Drupal website. Migrating from Drupal to WordPress gives you the perfect opportunity to redesign your site and give it the refresh it deserves.
What to Do After You Migrate From Drupal to WordPress
Once you finish migrating from Drupal to WordPress, you might wonder what to do with your former website. Now that all of its content is on a different site, you can go ahead and delete that Drupal installation.
If you’re using a single web host for both websites, you don’t need to rush to delete the Drupal site. However, if you’re paying for two hosting plans, there’s no reason to keep spending that money.
You could temporarily keep the Drupal website around if you missed anything during the migration. Once you’re sure that you completed the process correctly, go ahead and delete the site. In a worst-case scenario, you have a backup of that website right before the migration.
As for WordPress, you have plenty of new features and tools to play with. For starters, we recommend that you check out the WordPress.org plugin library. It contains thousands of free plugins, many of which can add features that you didn’t know your website could offer:
Summary
Drupal is a fantastic CMS if you value security and scalability. However, it pales compared to WordPress regarding customization options, ease of use, and styling your website.
With WordPress, you can build the website of your dreams using the right plugins and theme. Every aspect of WordPress is customizable, and migrating your content from Drupal is easy thanks to the FG Drupal to WordPress plugin.
Do you have any questions about how to migrate from Drupal to WordPress? Let’s talk about them in the comments section below!


Leave a Reply